Initial setup
Set up and manage your user management dashboard with SuperTokens integration and configuration instructions.
Overview
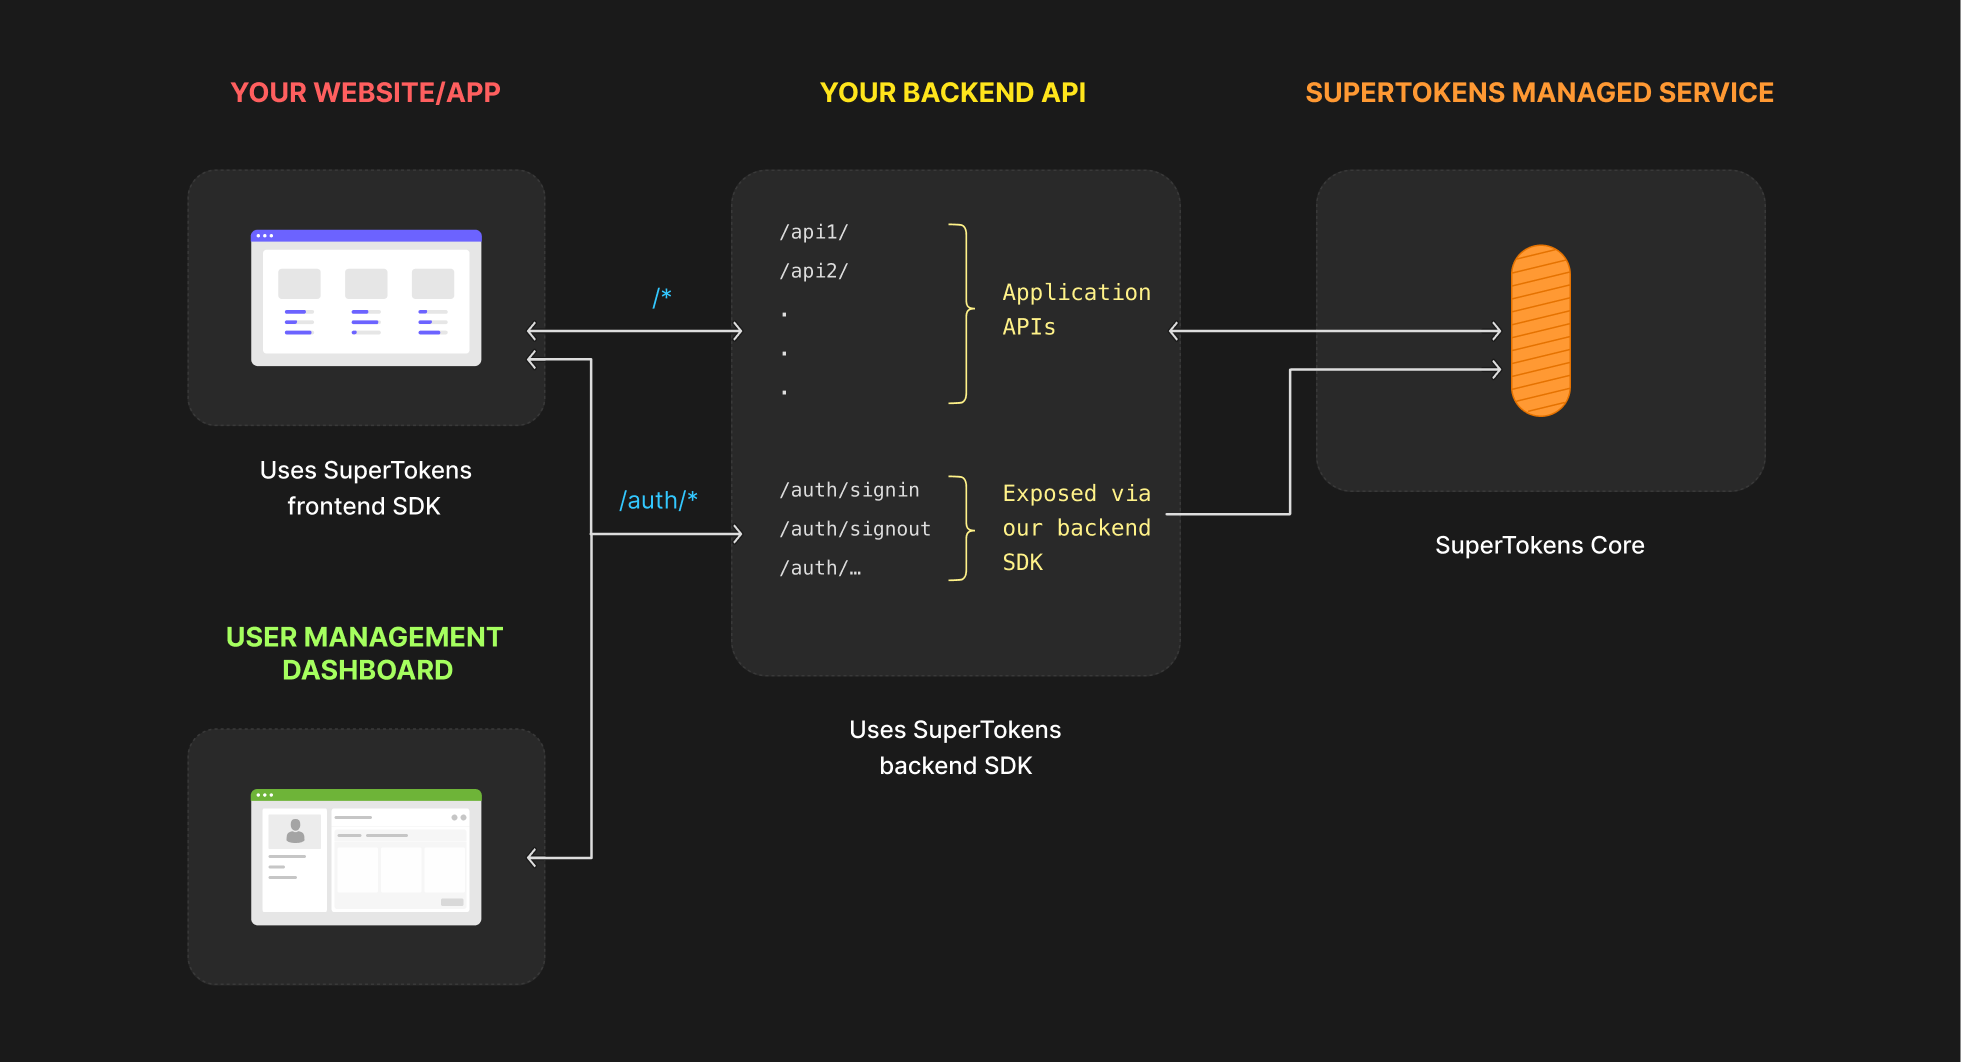
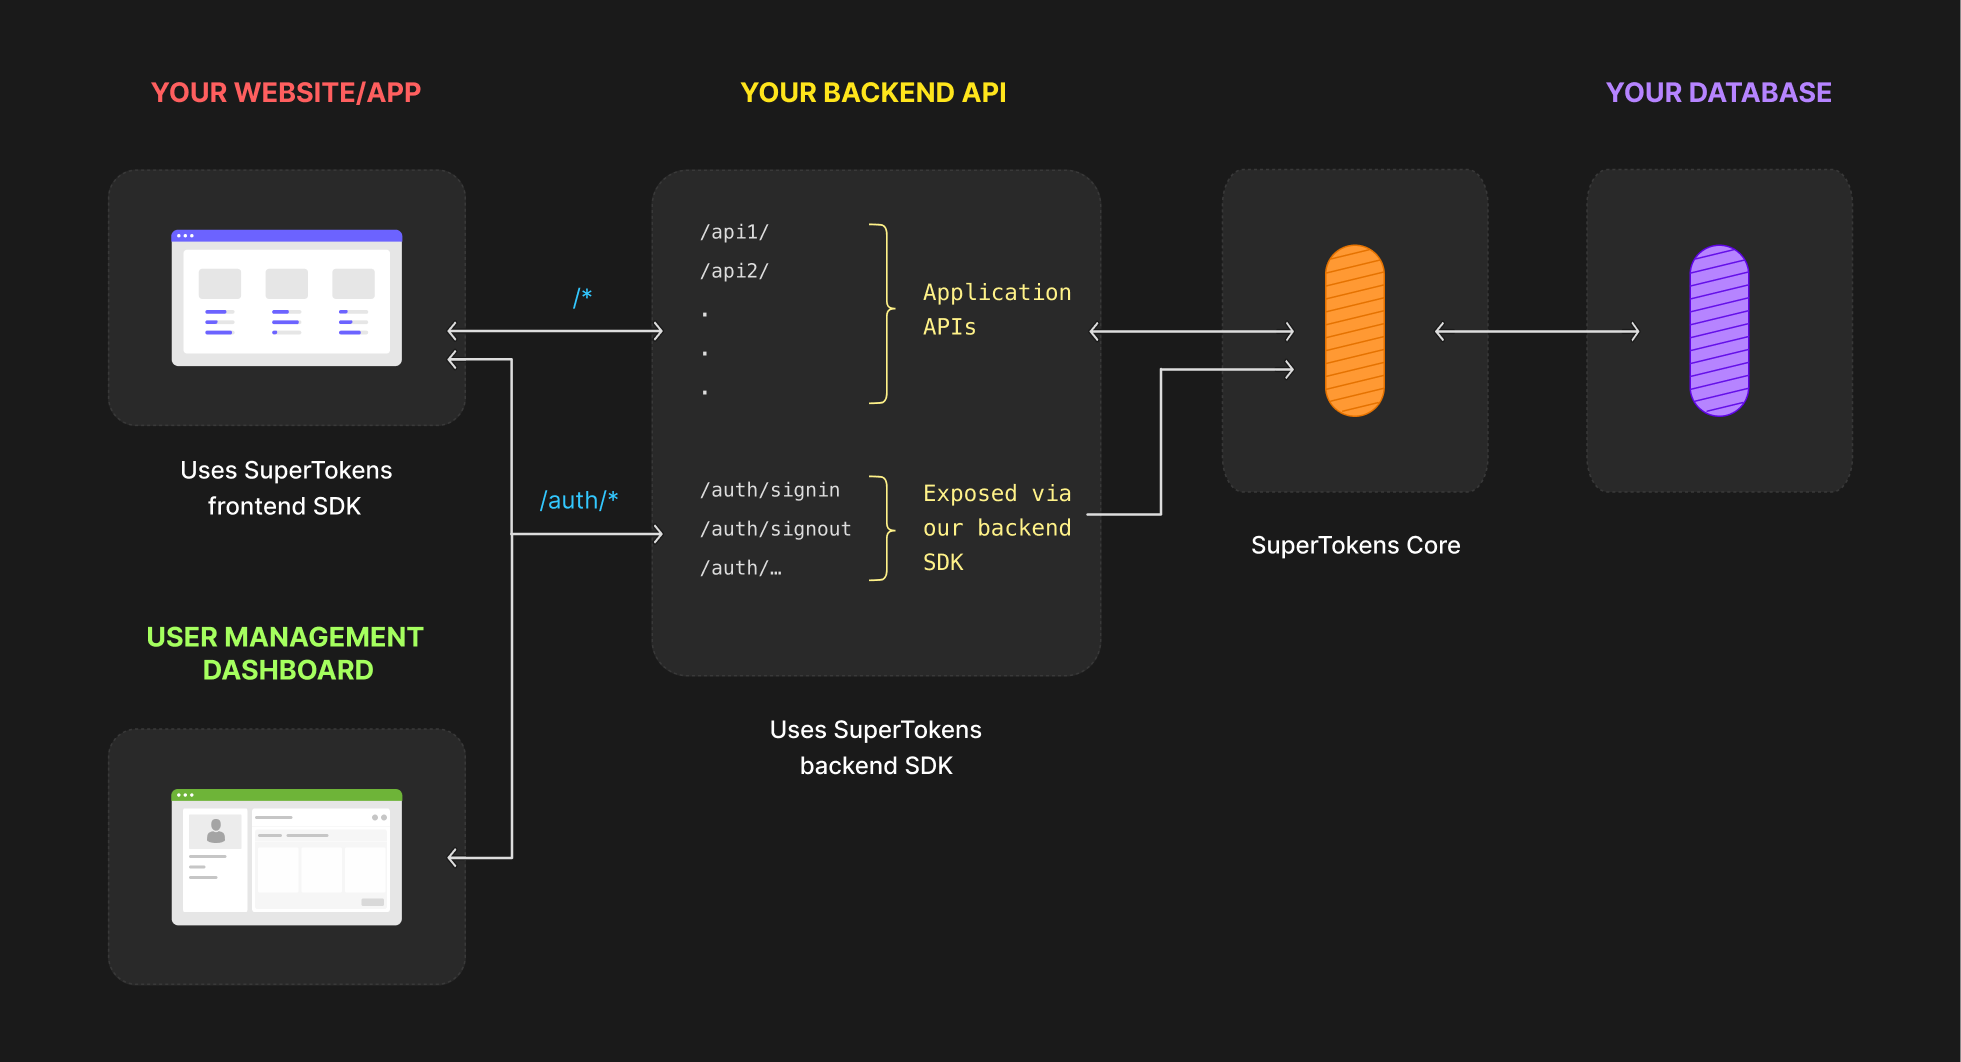
The following page shows you how to set up the dashboard recipe and access the web interface. You can check the next diagram to understand how the dashboard integrates with your application.
Steps
1. Initialize the Dashboard recipe
To get started, initialize the Dashboard recipe in the recipeList.
import SuperTokens from "supertokens-node";
import Dashboard from "supertokens-node/recipe/dashboard";

SuperTokens.init({
  appInfo: {
    apiDomain: "...",
    appName: "...",
    websiteDomain: "...",
  },
  recipeList: [
    // TODO: Initialise other recipes
    Dashboard.init(),
  ],
});
import (
"github.com/supertokens/supertokens-golang/recipe/dashboard"
"github.com/supertokens/supertokens-golang/supertokens"
)
func main() {
supertokens.Init(supertokens.TypeInput{
RecipeList: []supertokens.Recipe{
// TODO: Initialise other recipes
dashboard.Init(nil),
},
});
}from supertokens_python import init, InputAppInfo
from supertokens_python.recipe import dashboard
init(
app_info=InputAppInfo(
api_domain="...", app_name="...", website_domain="..."),
framework='...',
recipe_list=[
# TODO: Initialise other recipes
dashboard.init(),
]
)Update your content security policy (optional)
If your backend returns a Content-Security-Policy header, you encounter the following UI displaying the Content Security Policy violation details. Follow the instructions provided in this UI to make necessary adjustments to your backend Content Security Policy configuration.
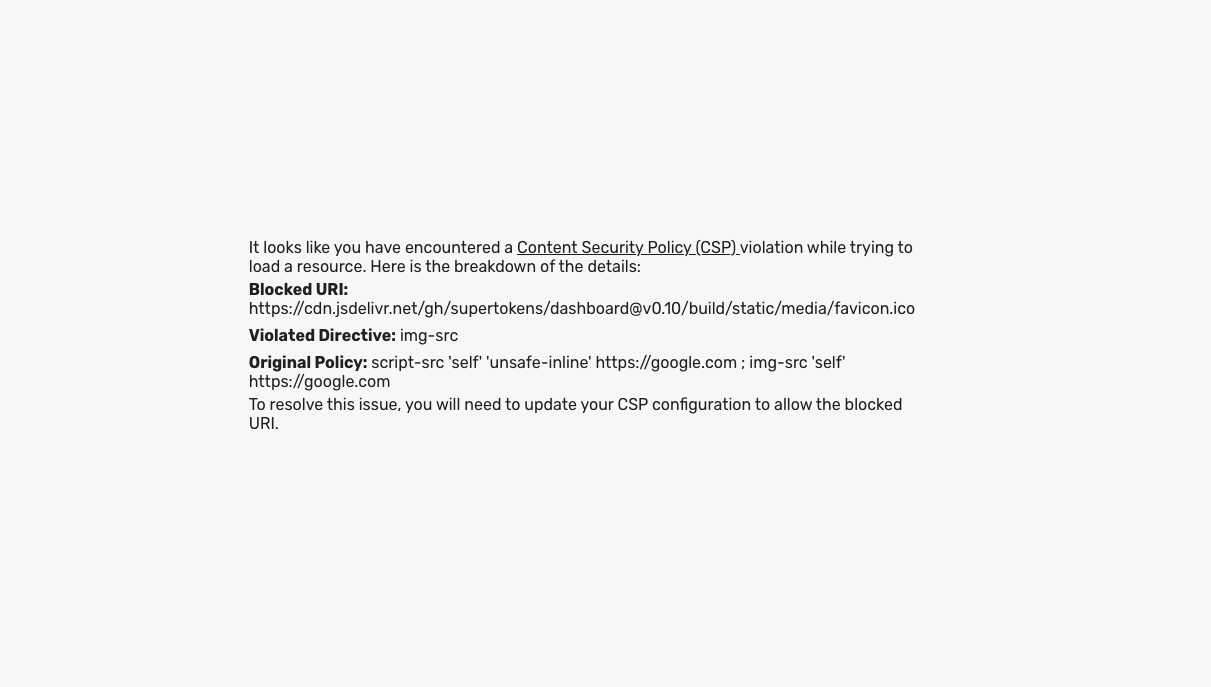
For example, to address the error message displayed in the above screenshot, you need to modify your original policy. In the given example, it appears as follows:
If you return a Content-Security-Policy header from your backend, you need to include the following directives for the user management dashboard to work correctly.
If you return a Content-Security-Policy header from your backend, you need to include the following directives for the user management dashboard to work correctly.
script-src:
  'self'
  'unsafe-inline'
  https://google.com

img-src:
  https://google.com
script-src:
'self'
'unsafe-inline'
https://cdn.jsdelivr.net/gh/supertokens/
img-src:
https://cdn.jsdelivr.net/gh/supertokens/
https://purecatamphetamine.github.io/script-src:
'self'
'unsafe-inline'
https://cdn.jsdelivr.net/gh/supertokens/
img-src:
https://cdn.jsdelivr.net/gh/supertokens/
https://purecatamphetamine.github.io/To resolve this issue, make the following adjustments:
script-src:
  'self'
  'unsafe-inline'
  https://google.com

img-src:
  https://google.com
https://cdn.jsdelivr.net/gh/supertokens/Essentially, you need to include the domain listed as the Blocked URI in your violated directive block within your original policy.
2. Access the dashboard
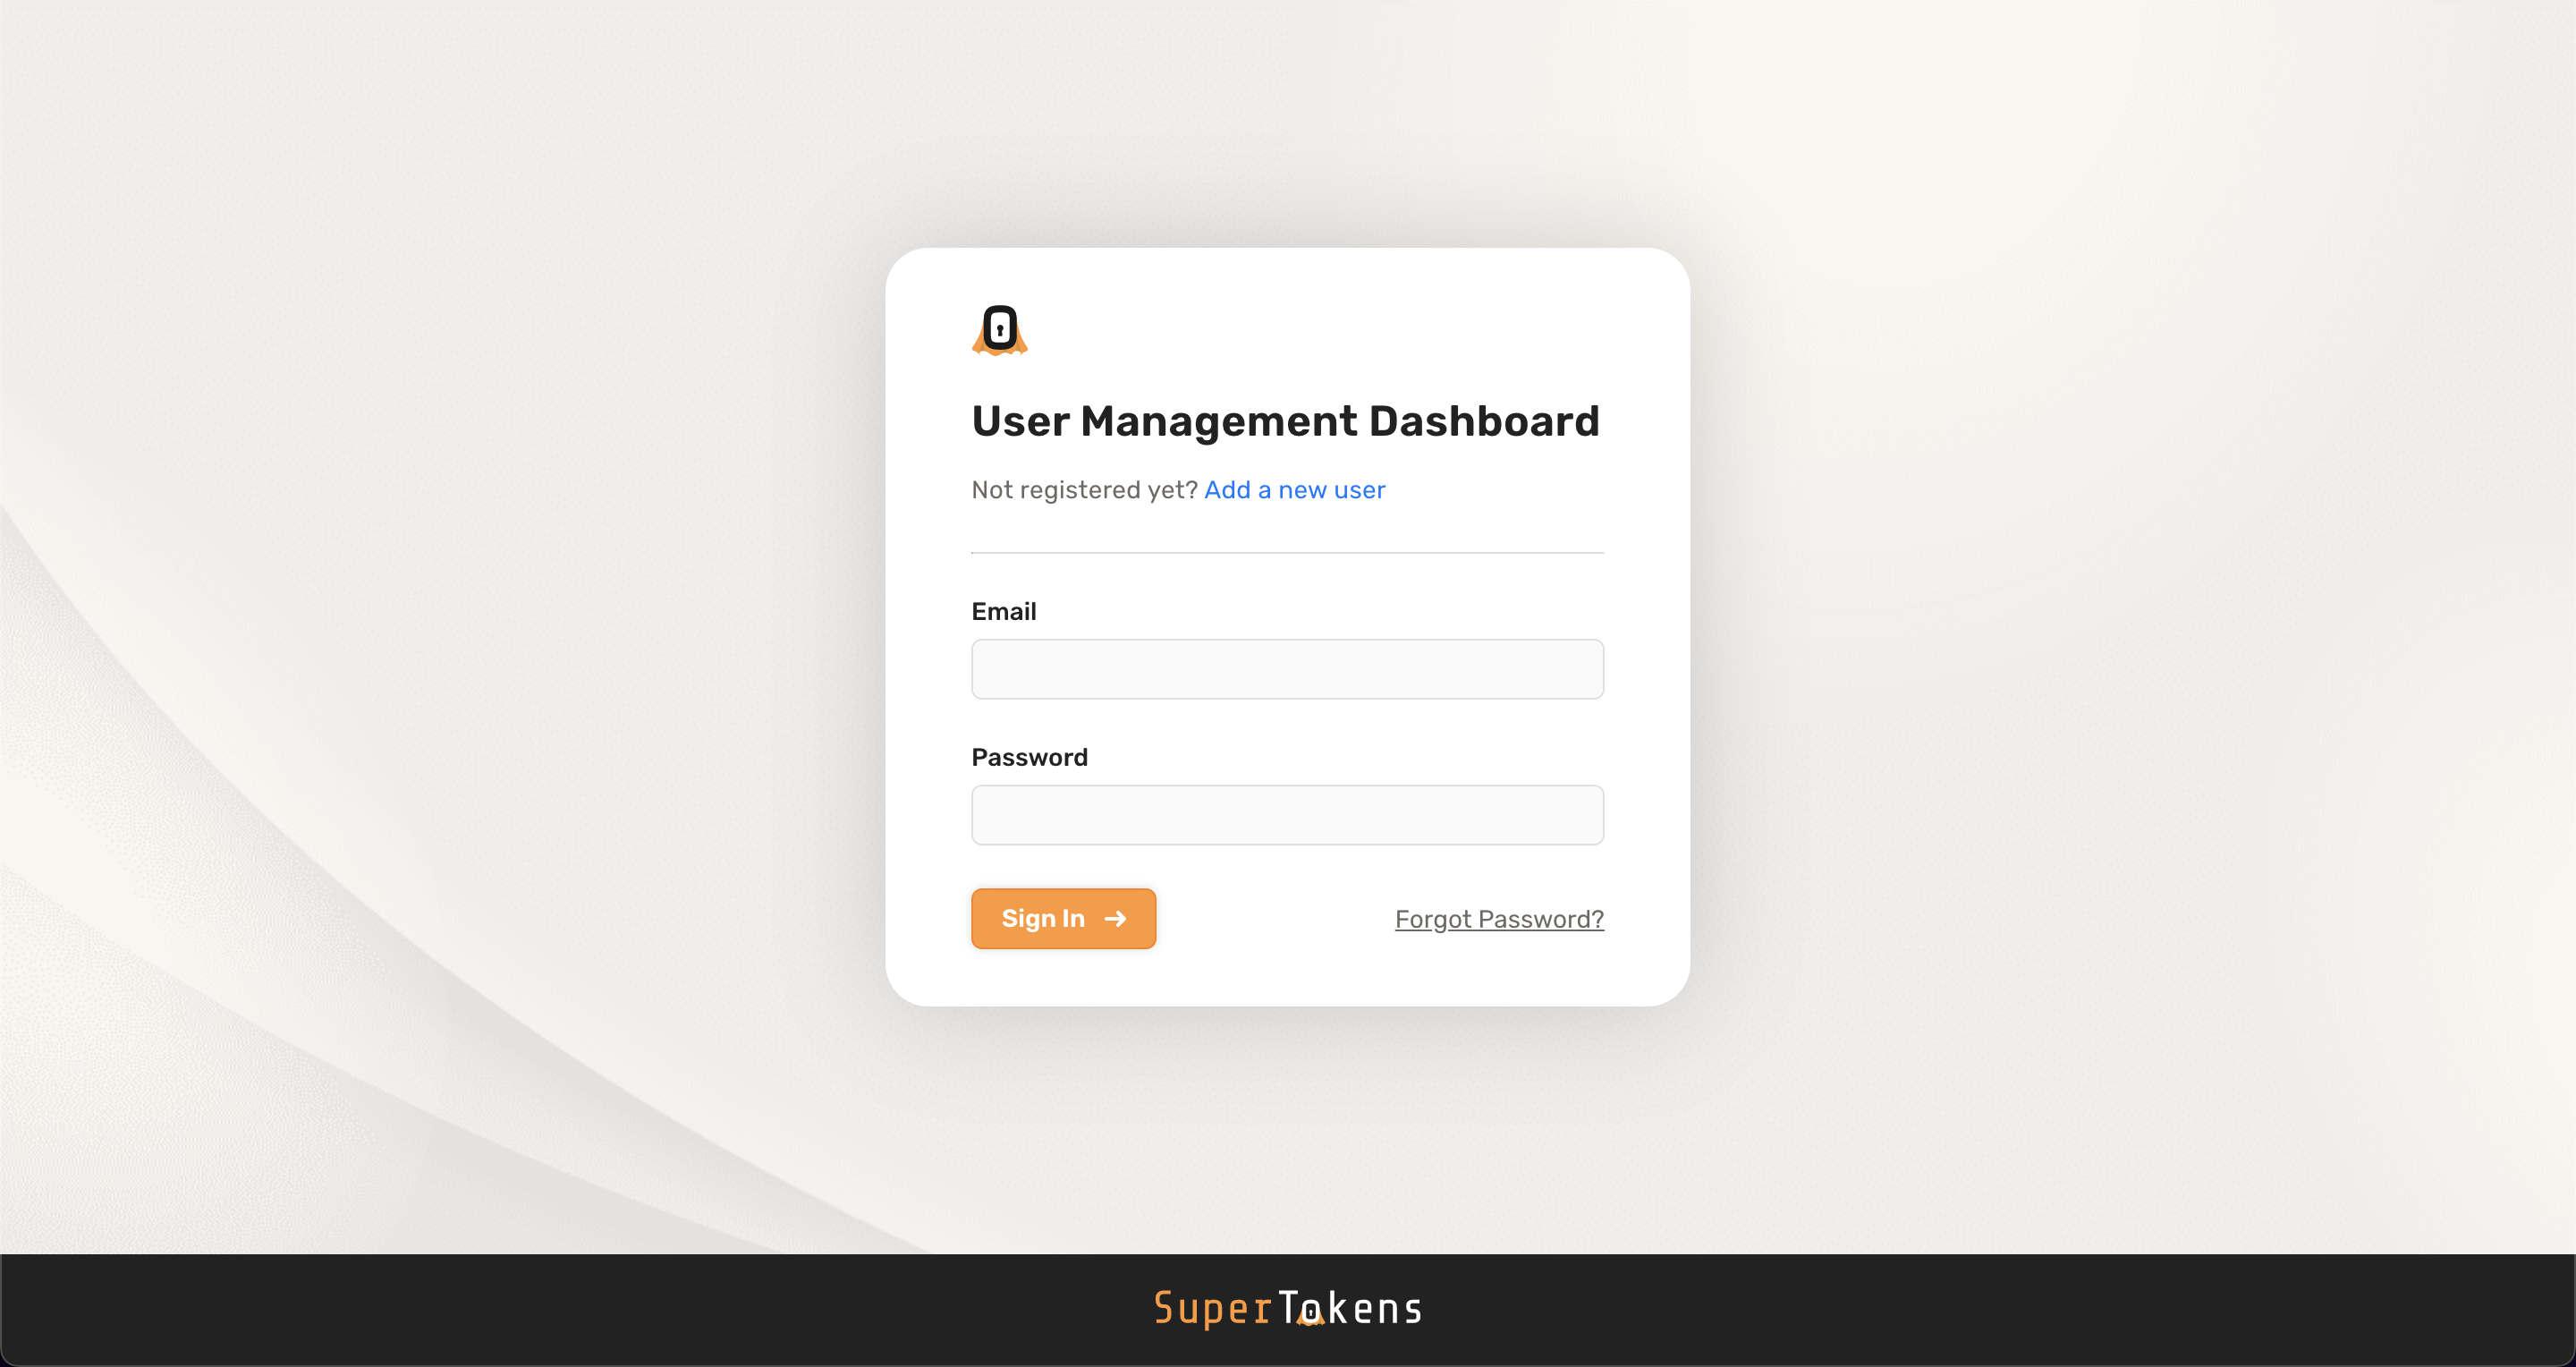
Navigate to <YOUR_API_DOMAIN>/auth/dashboard to view the dashboard.
3. Create dashboard credentials
When you first set up SuperTokens, there are no credentials created for the dashboard. If you click the “Add a new user” button in the dashboard login screen you can see the command you need to execute to create credentials.
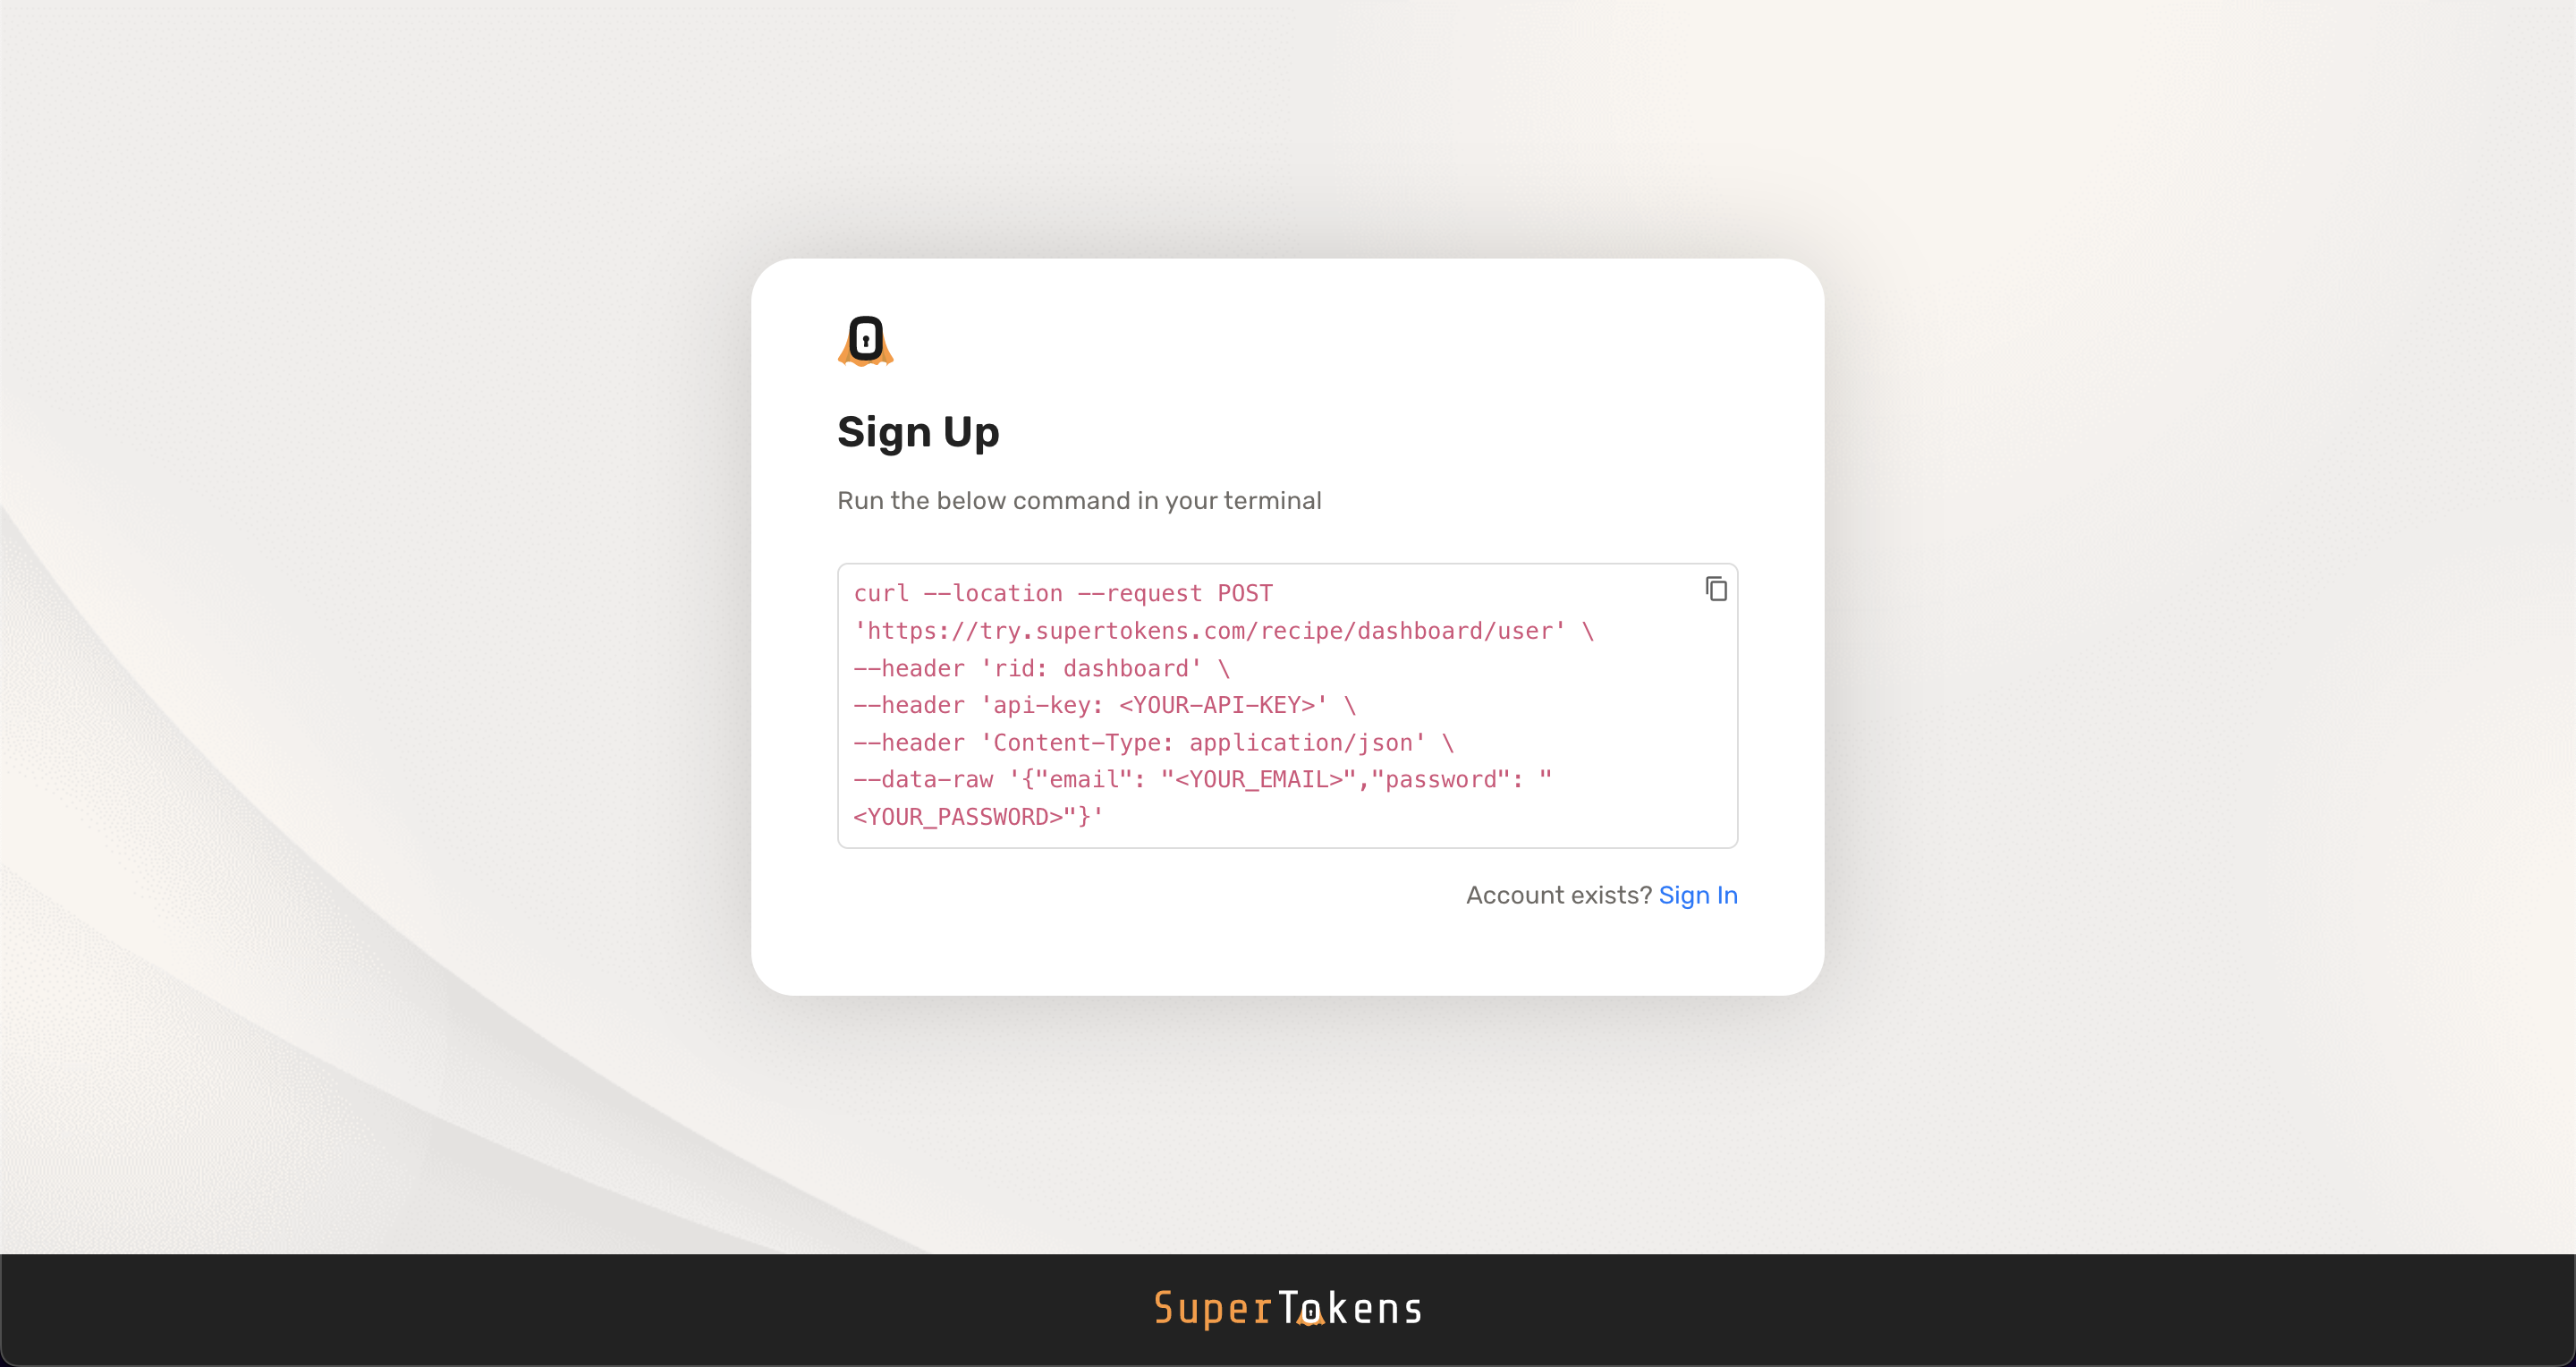
To create credentials you need to make a request to SuperTokens core.
- The example above uses the demo core
https://try.supertokens.com, replace this with the connection URI you pass to the backend SDK when initialising SuperTokens. - Replace
<YOUR-API-KEY>with your API key. If you are using a self hosted SuperTokens core there is no API key by default. In that case you can either skip or ignore theapi-keyheader. - Replace
<YOUR_EMAIL>and<YOUR_PASSWORD>with the appropriate values.
4. Update dashboard credentials
You can update the email or password of existing credentials by using the “Forgot Password” button on the dashboard login page.
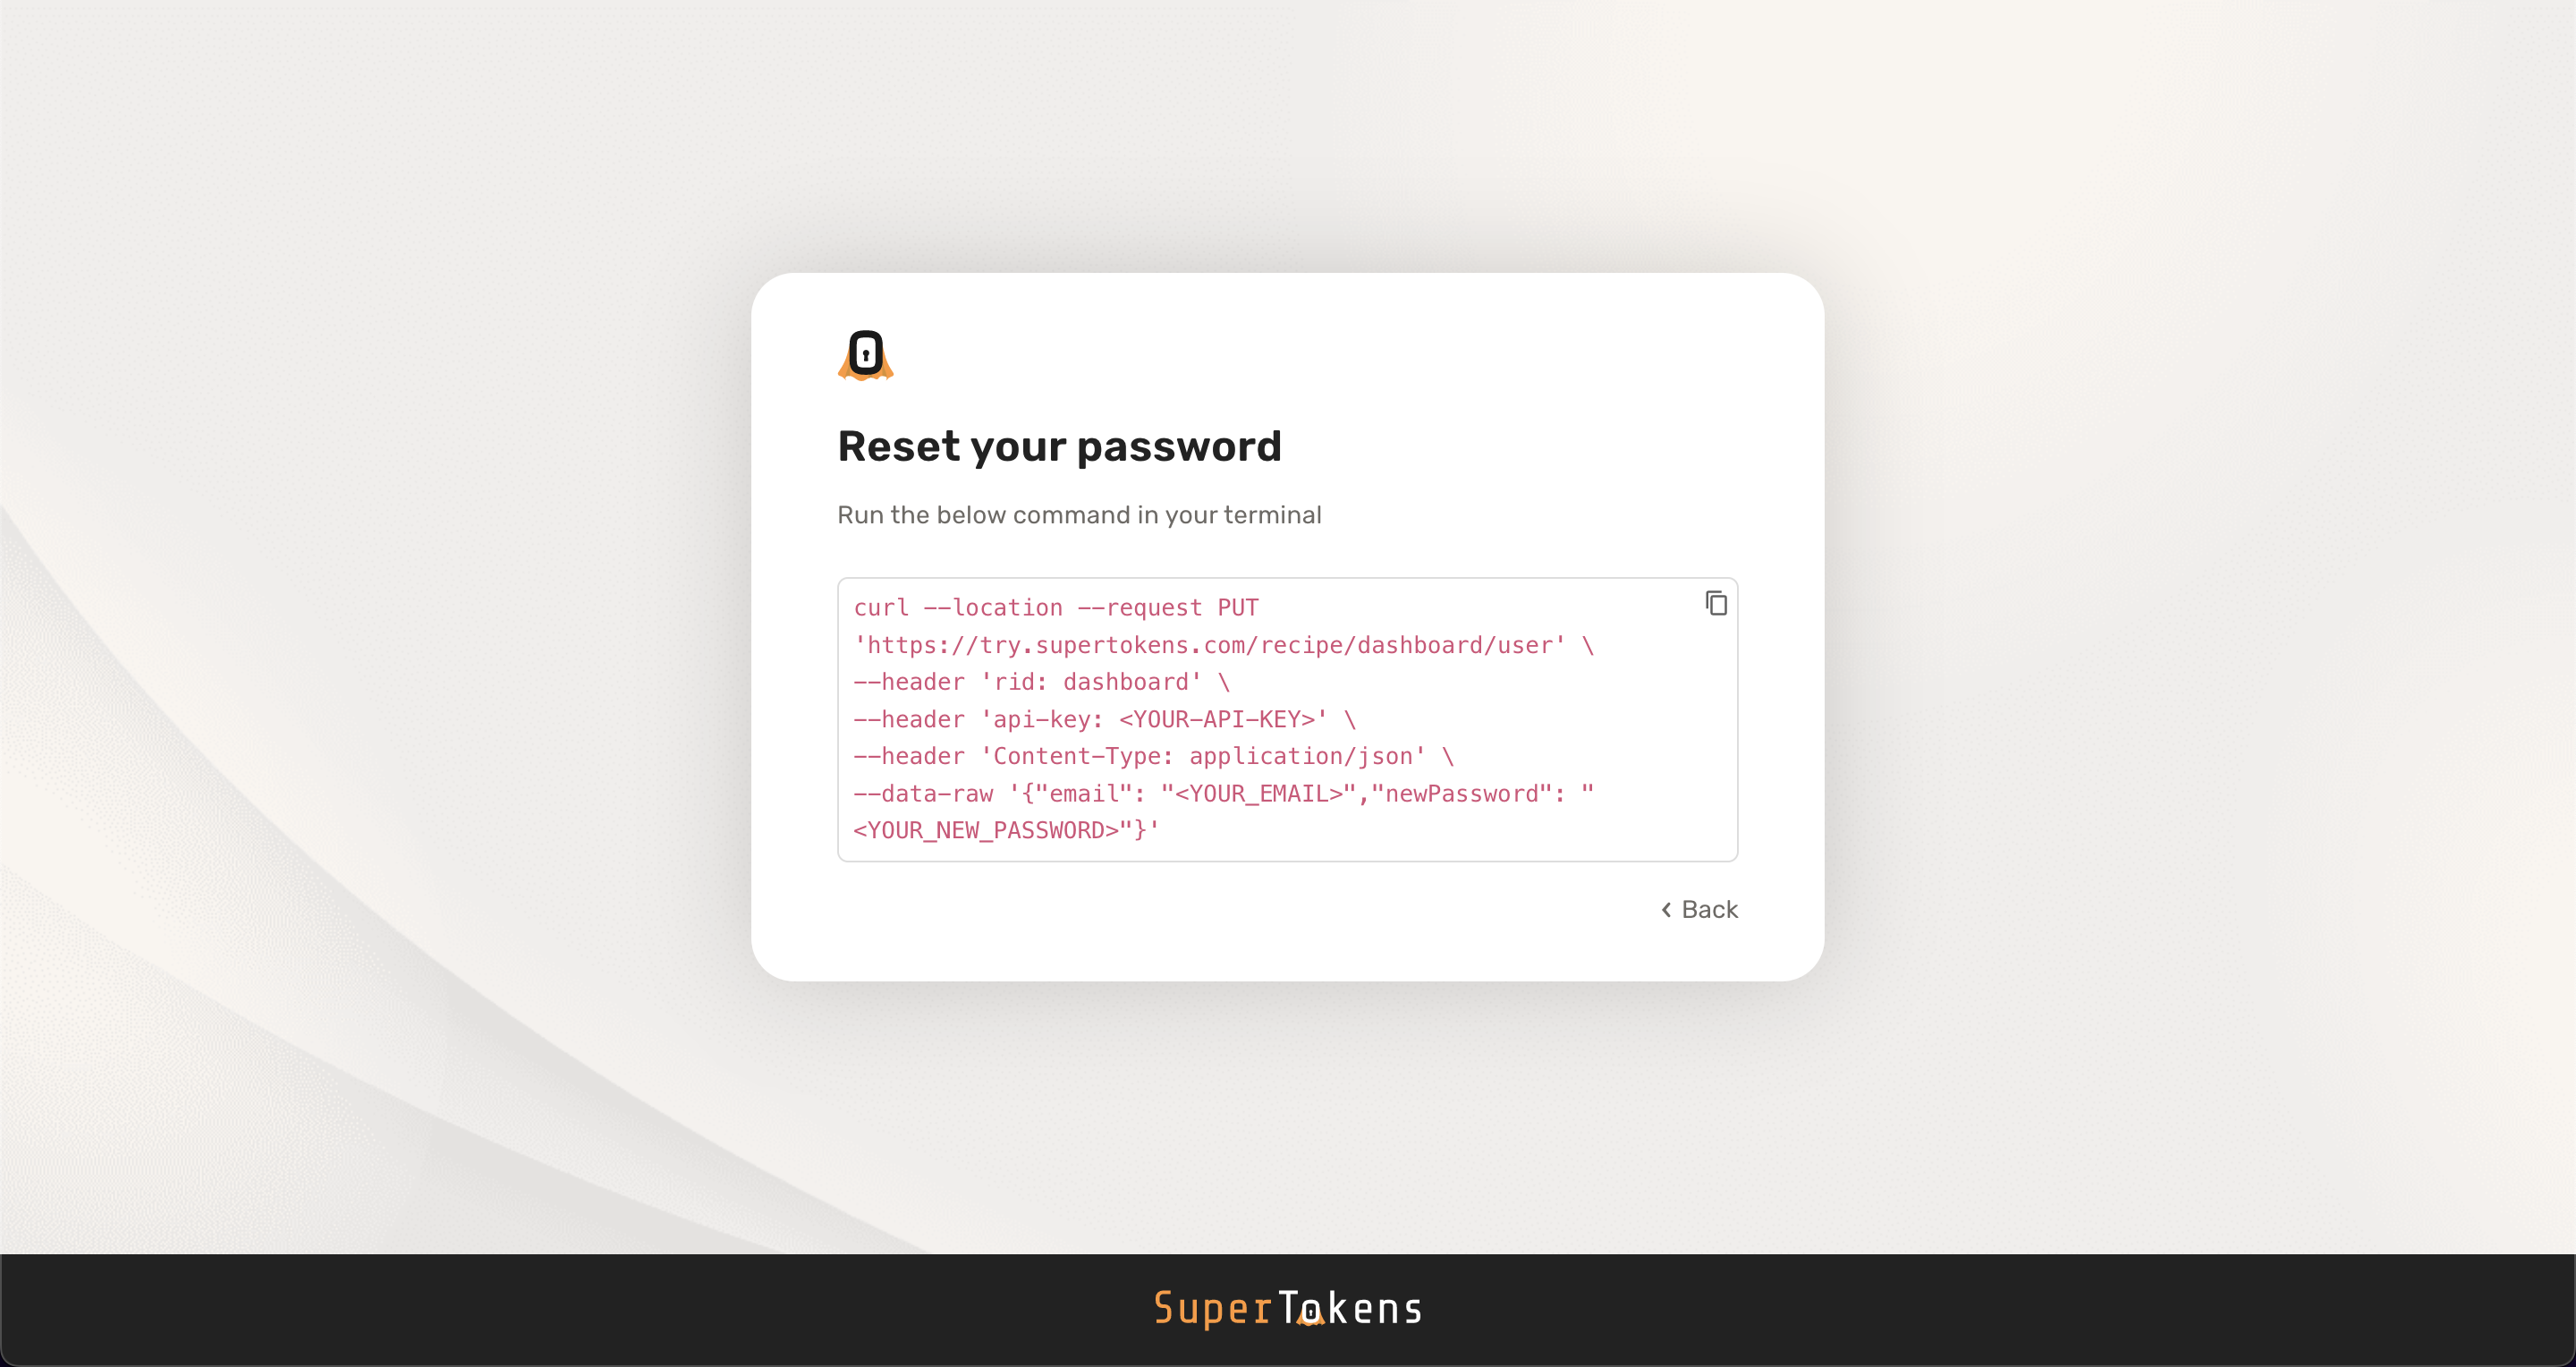
To update credentials you need to make a request to SuperTokens core.
- The example above uses the demo core
https://try.supertokens.com, replace this with the connection URI you pass to the backend SDK when initialising SuperTokens. - Replace
<YOUR-API-KEY>with your API key. If you are using a self hosted SuperTokens core there is no API key by default. In that case you can either skip or ignore theapi-keyheader. - Replace
<YOUR_EMAIL>and<YOUR_NEW_PASSWORD>with the appropriate values. You can usenewEmailinstead ofnewPasswordif you want to update the email
5. Restrict access to dashboard users
When using the dashboard recipe, you can restrict access to certain features by providing a list of emails considered as “admins.” If a dashboard user logs in with an email not present in this list, they can only perform read operations. All write operations result in the backend SDKs failing the request.
You can provide an array of emails to the backend SDK when initialising the dashboard recipe:
import SuperTokens from "supertokens-node";
import Dashboard from "supertokens-node/recipe/dashboard";

SuperTokens.init({
  appInfo: {
    apiDomain: "...",
    appName: "...",
    websiteDomain: "...",
  },
  recipeList: [
    // TODO: Initialise other recipes
    Dashboard.init({
      admins: ["johndoe@gmail.com"],
    }),
  ],
});
import (
"github.com/supertokens/supertokens-golang/recipe/dashboard"
"github.com/supertokens/supertokens-golang/supertokens"
"github.com/supertokens/supertokens-golang/recipe/dashboard/dashboardmodels"
)
func main() {
supertokens.Init(supertokens.TypeInput{
RecipeList: []supertokens.Recipe{
// TODO: Initialise other recipes
dashboard.Init(&dashboardmodels.TypeInput{
Admins: &[]string{
"johndoe@gmail.com",
},
}),
},
});
}from supertokens_python import init, InputAppInfo
from supertokens_python.recipe import dashboard
init(
app_info=InputAppInfo(
api_domain="...", app_name="...", website_domain="..."),
framework='...',
recipe_list=[
# TODO: Initialise other recipes
dashboard.init(
admins=[
"johndoe@gmail.com",
],
),
]
)